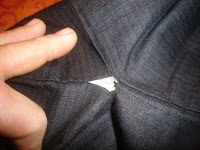
Welcome to the second part. Today we will see how they are fitted sleeves. The first step was removing the lining.
Esta es la unión del cuerpo y las mangas. Podéis ver las puntadas. Una cosa que me pareció importante. Las partes estaban dobladas y planchadas antes de cosidas.
This is the union of body and sleeves. You can see the stitches. One thing that seemed important. The sides were folded and ironed before sewn.
Esta es una imagen del cómo está cosido el forro. A ver si lo explico bien. Se coge la tela de la manga y se dobla a la mitad y ya tenemos la manga. Cogemos el forro de la misma medida y lo doblamos a la mitad. Ponemos uno encima de otro y cosemos.
This is a picture of how the lining is sewn. Let's see if I can explain it properly. Take the fabric of the sleeve and fold it in half and now you already have the sleeve. We take a piece of lining with the same size and fold in half. We put one above the other and sew.
 Entonces solo tenemos que darle la vuelta y Voila, la manga forrada. Es el sistema más simple y más efectivo que he visto en mi vida para forrar. Colocamos un remate en la bocamanga para fijarlo todo. So we just have to turn around and Voila, the sleeve lining. It is the simplest and most effective system to lining I've seen in my life. Put a shot on the cuff to fix everything.
 Para termina un pequeño detalle de la unión de la manga y el cuerpo, así estaba formada la sisa. To end a small detail of the union of the sleeve and body, and in this way was made the armhole.


No hay comentarios:
Publicar un comentario